Many home mixologists know the feeling: you have a beautiful shaker, quality ingredients, and yet the result tastes watery or not sufficiently chilled. The problem is almost never in the ingredients themselves. It's in the technique. Shaking cocktails step-by-step is a skill you can learn, but you need to know what you're doing and why. This guide takes you from the right equipment to the perfect finish, including nuances like dry shake and double strain that make the difference between a regular drink and a bar-quality cocktail.
Table of Contents
- Key Insights
- The Basic Essentials for Cocktail Shaking
- The Shaking Technique Step-by-Step
- Double Strain and Serving
- Troubleshooting: Common Mistakes
- What I Learned from My First Mistakes
- Cocktailsbynina Helps You Further
- FAQ
Key Insights
| Point | Details |
|---|---|
| Use the right shaker | A cobbler shaker is more suitable for beginners due to its built-in strainer and simpler closing mechanism. |
| Shake for 10 to 15 seconds | The ideal shaking duration ensures sufficient cooling and dilution without disturbing the flavor. |
| Dry shake with egg whites | For cocktails with egg whites, shake first without ice to achieve a stable, creamy foam. |
| Double strain for texture | Always use a coarse and fine strainer together to filter out ice chips and pulp. |
| Serve immediately after shaking | Do not wait after shaking: texture and temperature quickly deteriorate. |
The Basic Essentials for Cocktail Shaking
Before you start shaking, it's good to know what you need. Your choice of shaker directly affects how easily you master the technique.
Which shaker do you choose?
There are two commonly used types. The cobbler vs. Boston shaker are the most common options in a home bar. The cobbler shaker consists of three parts: a cup, a lid with a built-in strainer, and a cap. Ideal for beginners, as you don't need a separate strainer. The Boston shaker consists of two cups that click together. It requires a bit more technique to seal properly, but it's the favorite of professional bartenders for better control.
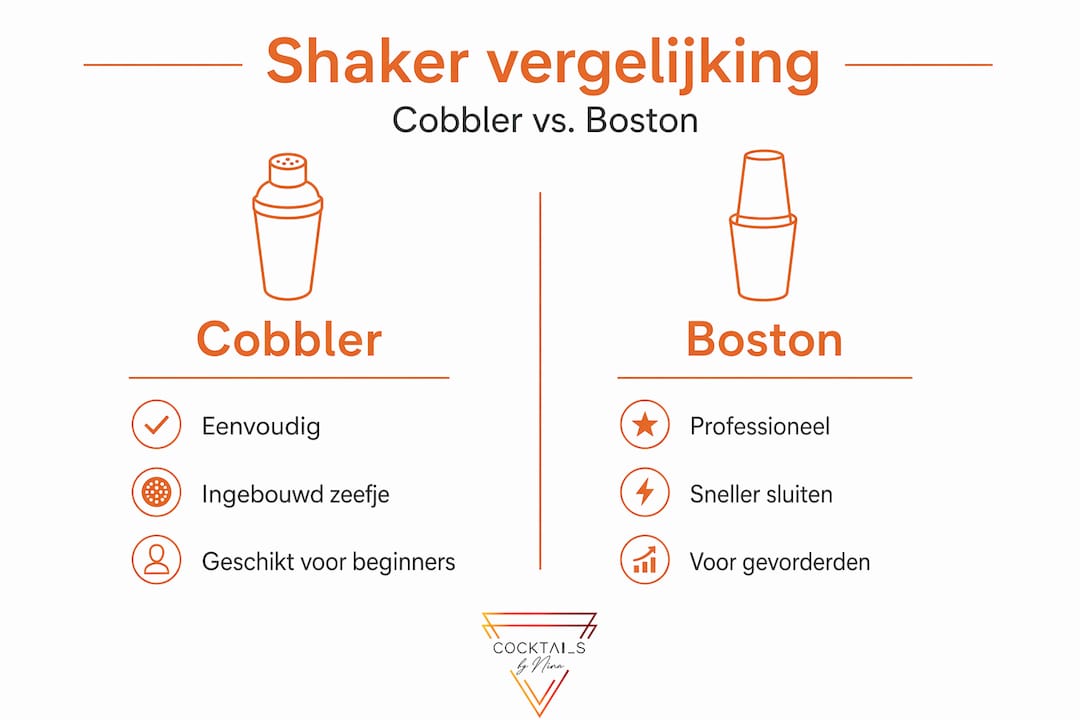
| Type | Advantages | Disadvantages | Suitable for |
|---|---|---|---|
| Cobbler shaker | Simple, built-in strainer | Can leak with temperature differences | Beginners |
| Boston shaker | Professional, durable | Requires separate strainer, harder to seal | Advanced |
Ice: more than just a cooling element
Fresh, hard ice is not an afterthought. Filling two-thirds of the shaker with ice is the standard: too little ice melts quickly and dilutes the cocktail before you've shaken it properly; too much restricts the liquid's movement and reduces efficiency. Always use large, clear ice cubes. Small ice particles melt too quickly and result in a watery drink. You can find good tips for ice in cocktails in a separate guide by Cocktailsbynina.
Further tools you need
- Jigger: for precise measuring of your ingredients (always use measurements, not by feel)
- Hawthorne strainer: a coarse strainer that fits the Boston shaker
- Fine mesh strainer: the fine strainer for double straining
- Bar spoon: for cocktails you stir instead of shake
Pro-tip: Always add ingredients in this order: syrups and juices first, then alcohol, and ice last. This prevents ice from melting quickly while you are still measuring ingredients.
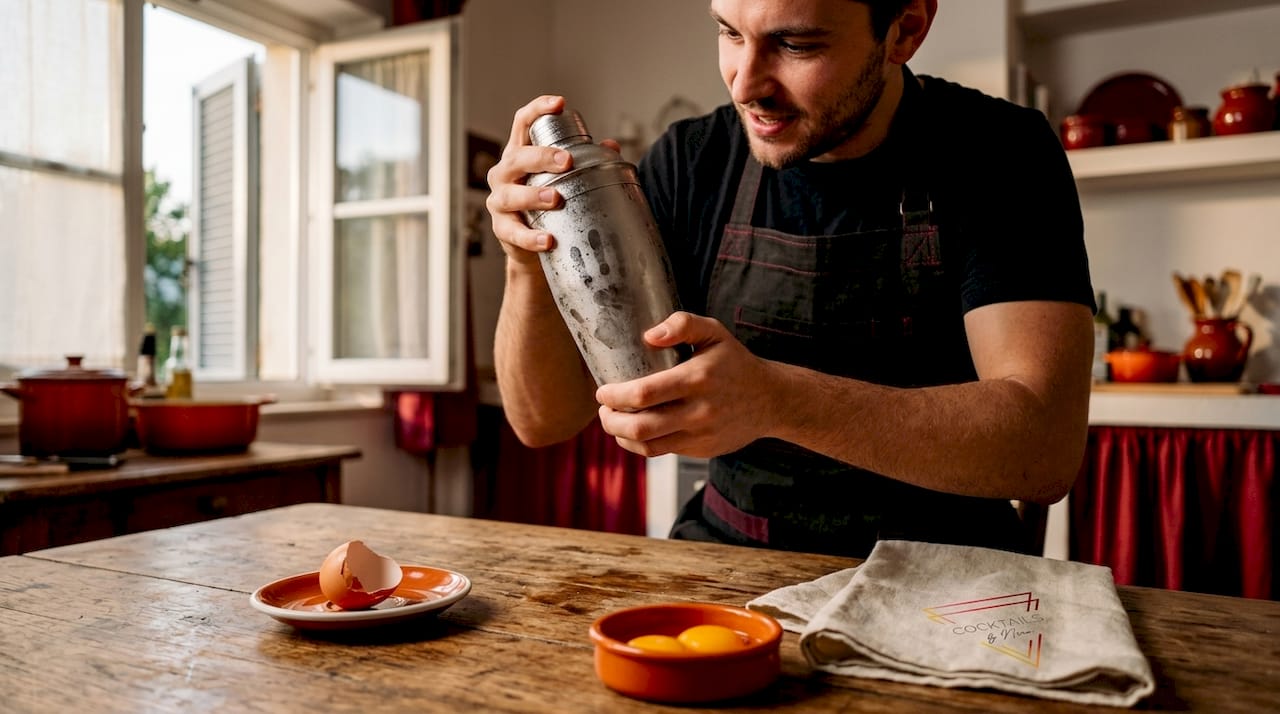
The Shaking Technique Step-by-Step
Now that the equipment is ready, it's time for the real work. The shaking motion from the shoulder is the foundation of a good cocktail. Not from the wrist, not with small movements. Powerful, rhythmic, at shoulder height.
How to correctly fill and seal your shaker
- Measure all ingredients with a jigger and add them to the shaker.
- Fill the shaker two-thirds with fresh ice.
- Close the cobbler shaker by pressing the lid firmly. For a Boston shaker, tap the top tin with a firm palm onto the bottom tin to create a vacuum seal.
- Hold the shaker with both hands: one hand on top, one on the bottom.
- Shake vigorously back and forth at shoulder height for 10 to 15 seconds.
Timing and temperature as a guide
The ideal shaking duration of 10 to 15 seconds is not arbitrary. After this time, the shaker will be ice cold on the outside, indicating that the cocktail has reached the right temperature. A good shake also ensures controlled dilution of about 20 to 25 percent, which improves flavor balance and softens harsh alcohol notes.
| Phase | Duration | Purpose |
|---|---|---|
| Dry shake | 5 to 10 seconds | Whip egg whites without ice |
| Wet shake | 10 to 15 seconds | Cool, mix, and dilute |
| Standard shake | 10 to 15 seconds | Cool, mix, slight dilution |
The dry shake: when and how
For cocktails with egg whites, such as a Whiskey Sour or a Pisco Sour, you use a special technique. A dry shake of 5 to 10 seconds without ice ensures that the egg white is properly whipped into a stable emulsion. Only then do you add ice for the wet shake. Dry shaking is indispensable for that creamy, long-lasting foam you see in a good cocktail bar.
Important detail: an airtight shaker is not optional during the dry shake. Building pressure in the shaker is essential for a stable emulsion. Ensure the seal is perfect before you begin.
Pro-tip: Want your foam extra stable? Add a small piece of ice during the dry shake, but only after the first 5 seconds. This gives the emulsion a little extra firmness without damaging the foam.
Double Strain and Serving
You've shaken. Now comes the finishing touch, and it matters more than most people think.
What is double strain and why do you use it?
Double straining prevents ice chips and pulp in your cocktail and significantly improves mouthfeel. The method works as follows: you pour the cocktail through a Hawthorne strainer (coarse sieve) and at the same time through a fine mesh strainer (fine sieve). The result is a clear, silky smooth cocktail without distracting texture.
Double straining gives a silky mouthfeel by removing micro ice chips and pulp. It's a step many home mixologists skip, but for citrus cocktails like a Daiquiri or Margarita, the difference is hugely noticeable.
Serve immediately
Serving immediately after shaking is not luxury advice, it's a requirement. Every minute you wait, the temperature increases and you lose the texture. So make sure your glass is ready before you start shaking.
A few tips for the perfect presentation:
- Chill your glass beforehand by briefly placing it in the freezer or filling it with ice while you shake.
- Choose the right glass for your cocktail: a coupe glass for a Daiquiri, a highball glass for a Paloma.
- Garnish only after pouring, so your presentation remains fresh and neat.
- Use sustainable straws if you serve cocktails with garnish and ice. Check out options for sustainable beverage presentation if you serve cocktails to guests frequently.
Pro-tip: Want to serve a cocktail with foam, such as a Whiskey Sour? Pour the cocktail carefully into the glass so that the foam floats on top instead of mixing through it.
Troubleshooting: Common Mistakes
Even with the right tools, things sometimes go wrong. These are the most common problems and how to solve them.
-
Shaken too short (less than 8 seconds). The cocktail is not cold enough and the ingredients are insufficiently mixed. Timing distinguishes a bar-quality cocktail from a watery home version. Always shake for at least 10 seconds.
-
Shaken too long (more than 20 seconds). Shaking too long makes the cocktail too watery and can release bitter flavors from the ice. Use a timer or count consciously.
-
Shaking from the wrist. This provides too little force for effective cooling and mixing. The movement should be powerful and rhythmic from the shoulder, at shoulder height.
-
Shaker not properly sealed during dry shake. Insufficient pressure leads to a loose, unstable foam. Always check the seal before starting the dry shake.
-
Foam collapses immediately. This has two causes: the dry shake was too short, or the wet shake lasted too long. Keeping the wet shake short protects the foam structure you built during the dry shake.
“A perfect cocktail is not luck. It is the result of the right technique, the right timing, and the willingness to practice until it's right.”
Self-monitoring helps immensely. Taste your cocktails consciously and ask yourself three questions after each shake: Is it cold enough? Is the flavor balanced? Is the texture good? This way, you quickly gain insight into what your technique is still missing. You can also experiment with syrups and flavors to understand how small adjustments affect balance.
What I Learned from My First Mistakes
I performed my first serious shaking sessions with a cheap cobbler shaker, too little ice, and the conviction that the result would be good automatically. It wasn't. The cocktails were lukewarm, thin, and the egg white in my Pisco Sour remained a thin, fleeting layer that disappeared within ten seconds.
What surprised me most was that it wasn't the ingredients that made the difference. It was the little things. The angle of my shoulder. The moment I added the ice. The way I sealed the shaker for the dry shake.
I learned that patience with the dry shake is not exaggerated. Five extra seconds without ice can mean the difference between foam that lasts two minutes and foam that collapses immediately. That sounds dramatic, but it's really true.
What also helped me was starting with simple cocktails like a classic Daiquiri. It has three ingredients and forgives little. If you can shake that well, you've mastered the technique. After that, every more complex cocktail is a step further on the same foundation. Also, look into the background of classic cocktails at home if you want to understand why certain recipes have worked for decades.
My main advice: practice is worth more than the best tools. Buy a decent shaker, use good ice, and consciously shake ten cocktails. Your taste and technique will improve faster than you think.
— Ruud
Cocktailsbynina Helps You Further
Whether you're taking your first steps or refining your technique, Cocktailsbynina has options for every level. For those who want to turn theory into practice, Cocktailsbynina offers a cocktail workshop at home where you learn all techniques under professional guidance, from the perfect shake to serving with style.
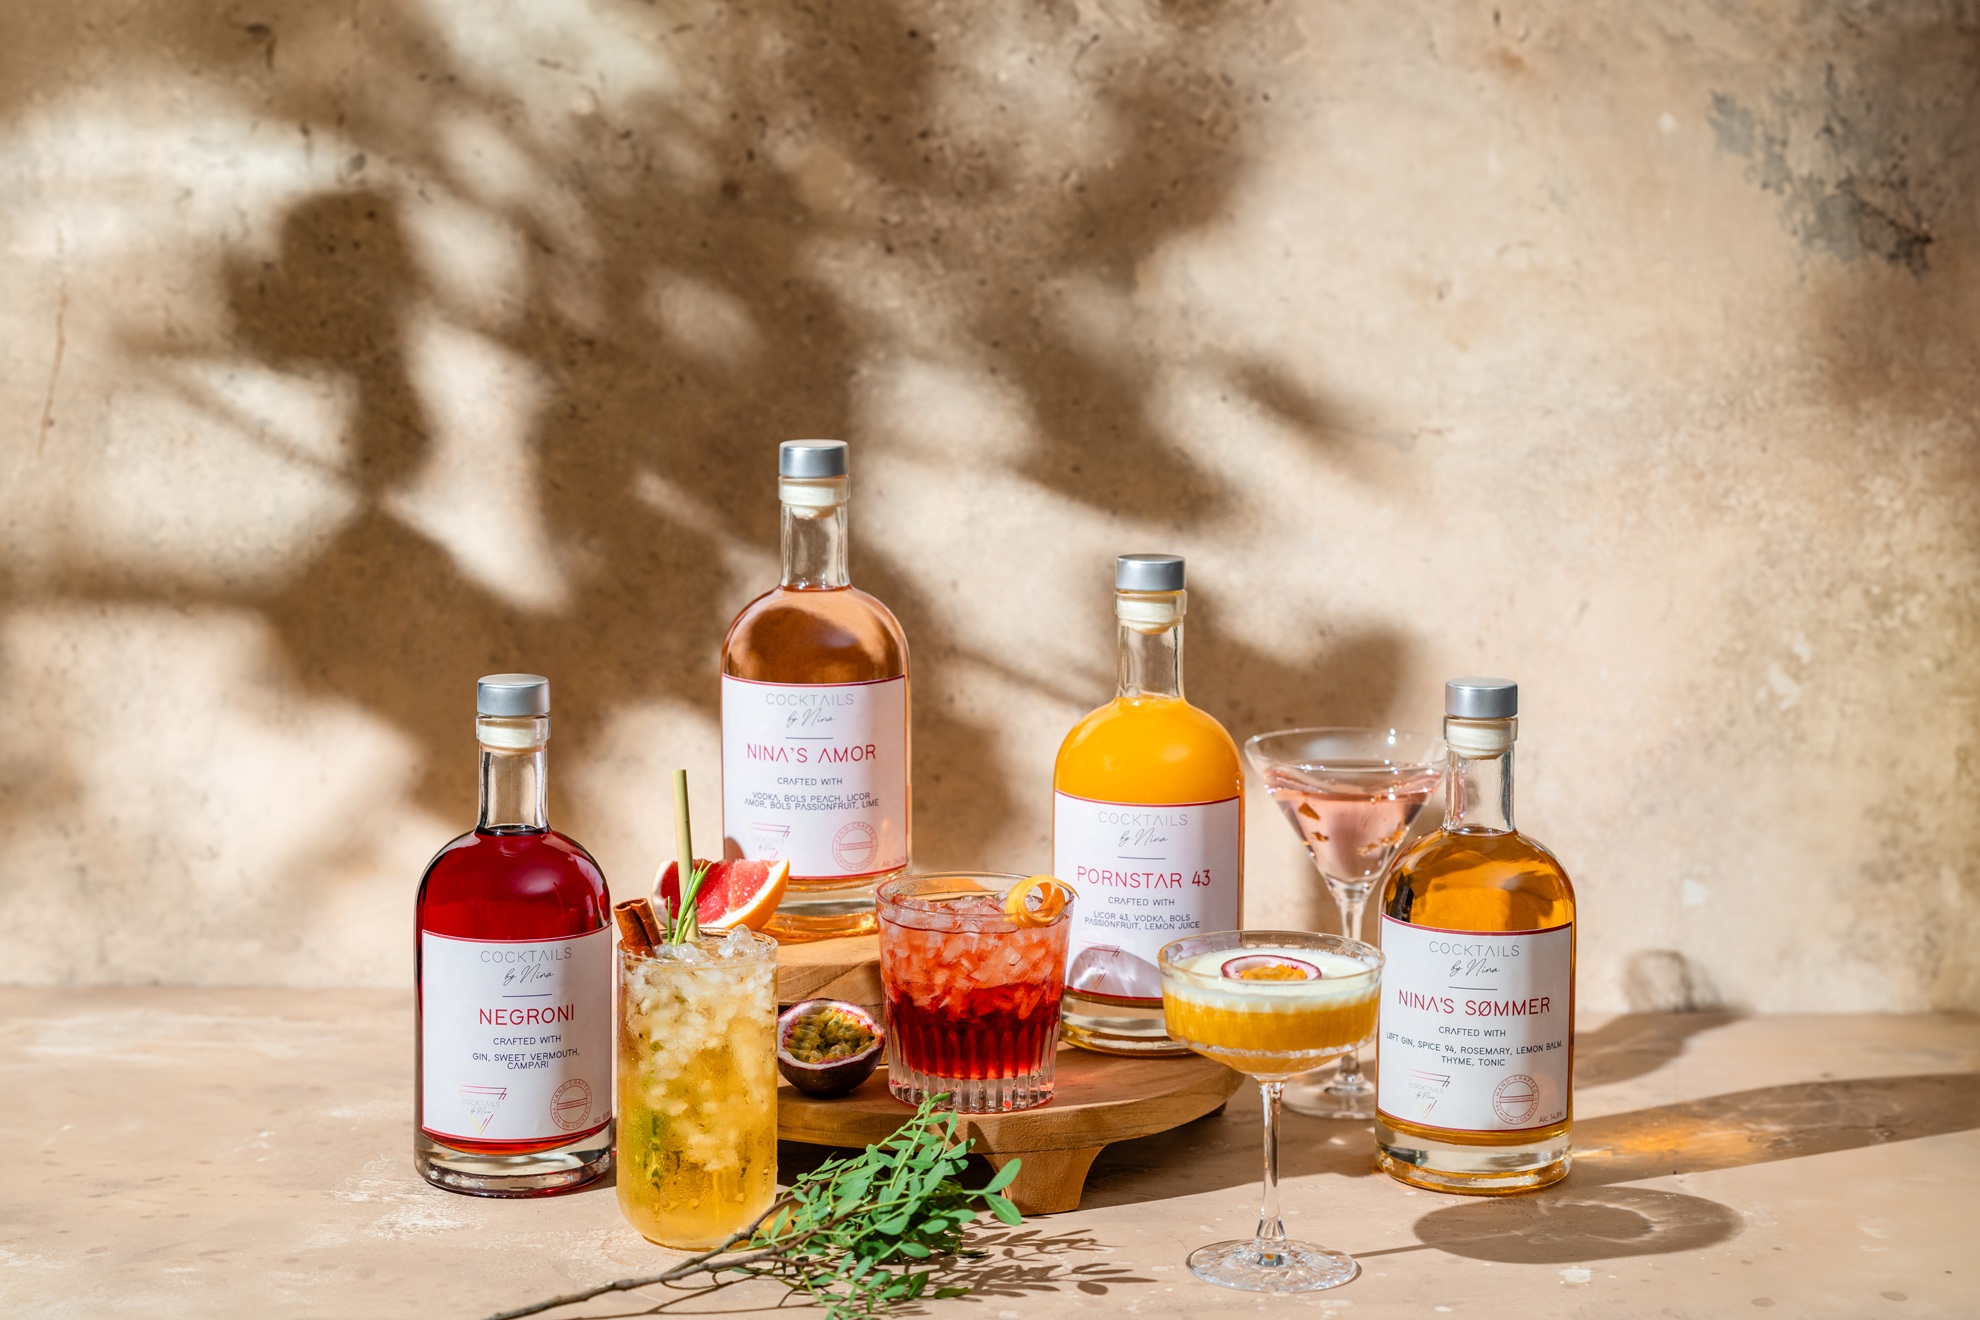
Do you prefer a flying start without having to prepare everything yourself? Cocktailsbynina's cocktail boxes are a solution. With the cocktail box for four people or the cocktail box for six people, you have everything you need to get started right away: premium ingredients, clear instructions, and recipes that guide you step-by-step. Perfect for a party, a birthday evening, or just a pleasant evening at home with friends. Cocktailsbynina makes it easy to create something beautiful from the first shake.
FAQ
How long should you shake a cocktail?
Shake a cocktail vigorously for 10 to 15 seconds. The shaker will then feel ice cold on the outside, indicating that the cocktail is sufficiently chilled and mixed.
What is the difference between dry shake and wet shake?
A dry shake is shaking without ice and is used for cocktails with egg white to create a stable foam. The wet shake follows with ice to chill and mix.
Why do you use double strain for cocktails?
Double straining removes micro ice chips and pulp from your cocktail, which results in a smoother mouthfeel and a clearer presentation. Use a coarse and fine strainer simultaneously.
Which shaker is best for beginners?
A cobbler shaker is ideal for beginners because it has a built-in strainer and is easier to seal than a Boston shaker.
Why does my shaken cocktail taste watery?
A watery cocktail is usually the result of shaking too long (more than 20 seconds) or using too little and too small ice. Use large ice cubes and shake for no longer than 15 seconds.
Recommendation
- Essential cocktail terms: your guide to clear choices – Cocktails by Nina
- Shots and drinks: the complete guide to ease and quality – Cocktails by Nina
- Spirits and mixers: the basis for premium cocktails at home – Cocktails by Nina
- What are classic cocktails: the ultimate guide for home – Cocktails by Nina