Step-by-step beverage decoration is the method of festively and personally decorating drinks using accessible techniques that anyone can apply, from beginners to experienced party hosts. Whether you want to personalize glasses with decals, build mocktails with colorful garnishes, or set up a complete sparkling bar: the right preparation and sequence determine the result. This article covers all techniques in logical steps, from choosing materials to avoiding common mistakes. You will learn to work with decals, frozen garnishes, garnishing techniques, and a well-arranged drinks table.
What materials do you need for beverage decoration?
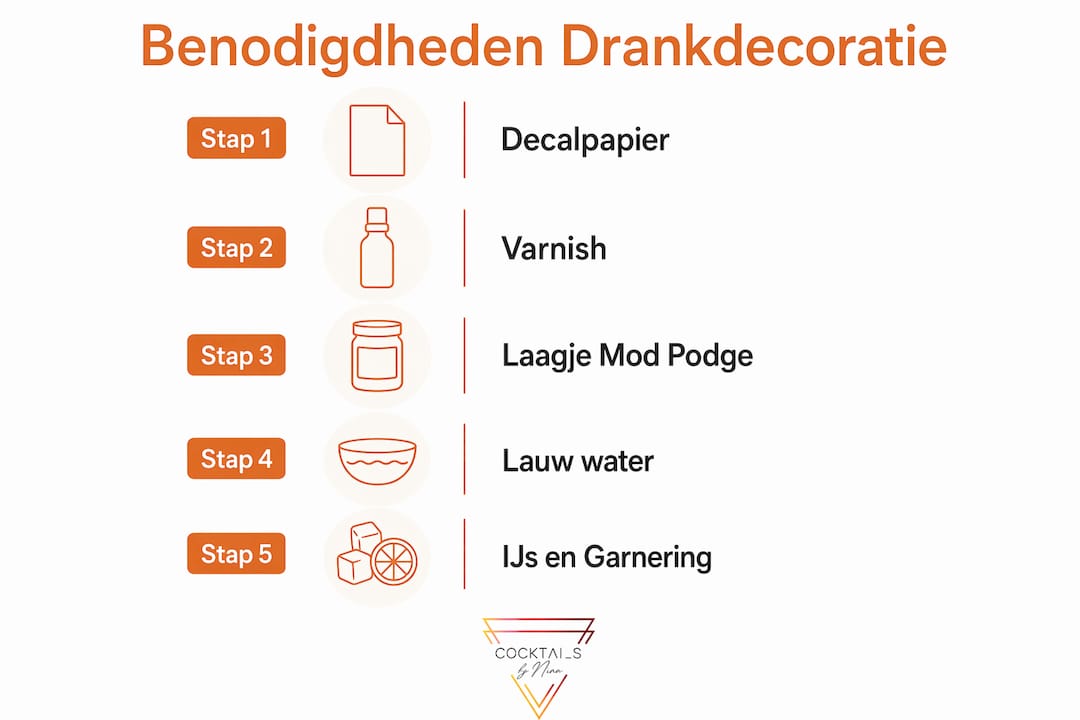
Good beverage decoration starts with the right materials, not inspiration. Without the correct tools, even the simplest techniques will fail. Below you will find an overview of what you need, categorized by decoration method.
Basic materials for glass decoration:
- Decal paper (glossy or photo paper, for inkjet printers)
- Clear varnish or Mod Podge as a base and protective layer
- Soft cloth or rubber squeegee for smoothing
- Glasses in various shapes: highball, coupe, tumbler
- Glass paint or glass markers for hand-painted details
Materials for garnishing and drink construction:
- Cocktail picks and skewers for fruit skewers
- Edible flowers such as violets, lavender, or marigolds
- Fresh herbs: rosemary, mint, thyme
- Ice molds in various sizes (cube, sphere, large block)
- Syrups in various flavors, such as syrups as flavor enhancers for color and taste
Additional supplies for advanced techniques:
- Oven or hairdryer (lowest setting) for fixing decals
- Tweezers for placing small garnishes
- Small funnel or pipette for layered drinks
- Cooler or refrigerated container for ice decorations
| Technique | Materials needed | Difficulty |
|---|---|---|
| Decals on glass | Decal paper, varnish, soft cloth | Medium |
| Frozen garnish | Ice molds, fruit, herbs | Easy |
| Fruit skewers | Picks, fresh fruit, edible flowers | Easy |
| Layered mocktail | Syrups, ice, pipette, highball glass | Medium |
Pro-tip: Always purchase decal paper specifically for inkjet or laser printers, depending on your printer. If you use the wrong type, the colors will bleed immediately upon contact with water.
How to apply decals to glasses step by step?
Applying decals to glasses is one of the most impressive techniques for personal beverage decoration. The result looks professional, but the process requires patience and the correct sequence.
Step 1: Print and dry the design
Print your design on glossy decal paper at the highest quality your printer offers. Allow to dry for at least 24 hours at room temperature before proceeding. This prevents ink from bleeding once the paper comes into contact with water. Never skip this step, even if the ink feels dry.
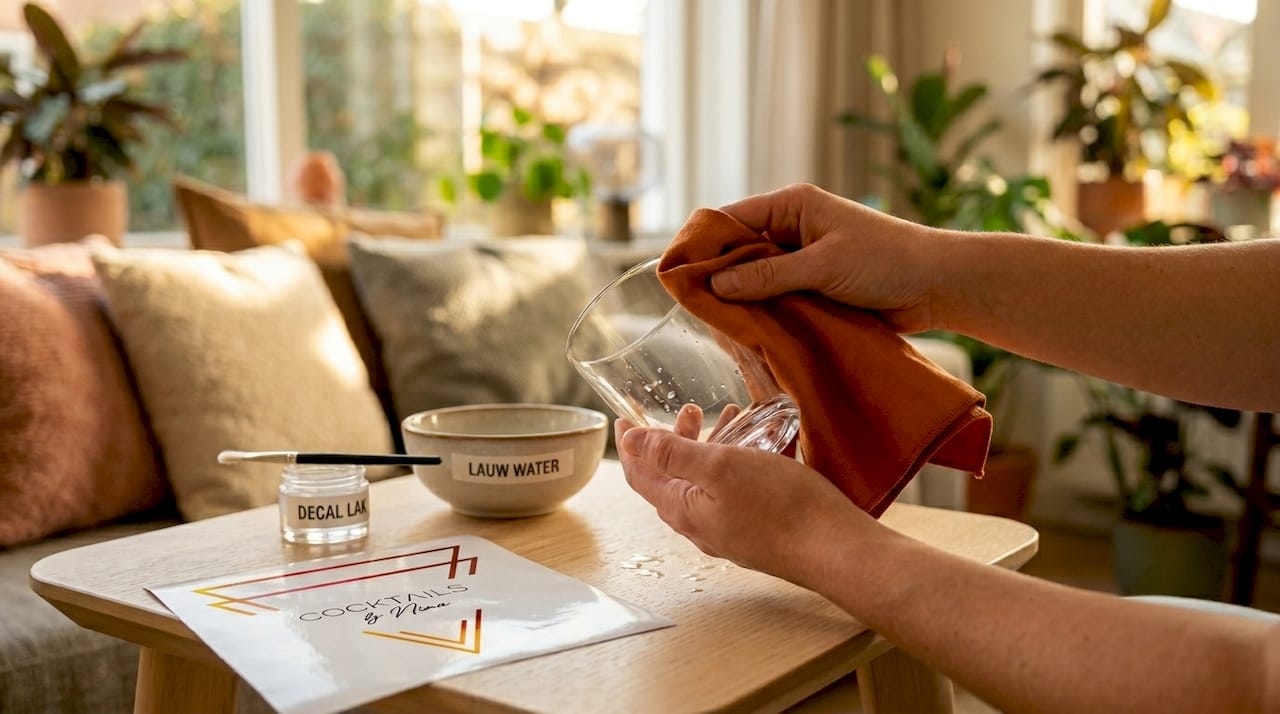
Step 2: Apply base coat to the glass
Apply a thin layer of clear varnish or Mod Podge to the glass surface where the decal will be placed. A base coat prevents silvering, a phenomenon where air under the decal causes a silvery haze. Allow the base coat to dry completely before proceeding. This is the step most beginners skip, and it makes the biggest difference.
Step 3: Soak and position the decal
Place the printed decal in lukewarm water for 30 to 60 seconds. The decal will then separate from the paper and can be positioned wet on the glass. Lightly moisten the glass surface so you can still slide the decal. Do a test placement before definitive positioning, as glass offers little room for error.
Step 4: Remove air bubbles
Use a soft cloth or rubber squeegee and smooth out air bubbles from the center outwards. Work calmly and with light pressure. Haste is your biggest enemy here. One careless movement creates a crease that cannot be repaired.
Step 5: Drying and optional fixing
Allow the glass to dry for 2 to 4 hours at room temperature on a flat surface. Do not use a hairdryer on a high setting, as heat can cause the decal to shrink. For extra durability, then apply a second layer of varnish as a protective layer.
“Glass is a critical surface for decals. Always plan a test placement with a spare decal before applying the final version. One practice run saves you a damaged glass and a failed decoration.”
Pro-tip: Want to make the decal extra durable for reuse? Bake the glass in the oven at 160 degrees Celsius for 30 minutes. Allow the glass to cool completely in the oven before removing it to prevent thermal shock.
What are creative ideas for garnishing and natural elements?
Garnishing is the quickest way to transform a drink from ordinary to festive. The best garnishes combine color, texture, and scent in one element. Cocktailsbynina regularly works with creative mocktail ideas that apply precisely this principle.
Building a mocktail in four steps
You build mocktails in four steps: base, flavorings, ice, and finishing with garnish. This gives you a logical structure that also works visually. Start with a clear or colored base like fruit juice or lemonade. Then add syrups for color and flavor, followed by ice that cools the drink and adds volume. Finish with a garnish that reinforces the theme.
Making frozen garnishes
Frozen garnishes like cranberries or rosemary in ice cubes are surprisingly simple but require planning. Place cranberries or a sprig of rosemary just below the water in an ice mold and freeze for at least 6 hours until solid. This means you start the evening before the party, not the morning of. The result is an ice cube that melts slowly, allowing the garnish to float like a jewel in the glass.
Pro-tip: Use filtered or boiled water for ice cubes. Tap water contains air bubbles that make the ice cloudy. Clear ice looks more professional and shows the garnish better.
Ideas for themed beverage decoration
The choice of garnish determines the theme of your drink presentation. Below is an overview of combinations that work well for specific events:
- Wedding or baby shower: edible violets, lavender sprigs, rose water in the base
- Christmas or New Year's: rosemary in ice cubes, cranberries, gold sugar rim
- Summer garden party: cucumber ribbon, mint, lemon slice on the rim
- Birthday: colorful fruit skewers with strawberries, kiwi, and pineapple, rainbow sugar rim
- Halloween: black food coloring in the base, frozen blueberries, dry ice for smoke effect
| Event | Garnish | Color Palette |
|---|---|---|
| Wedding | Edible flowers, lavender | White, lilac, gold |
| Christmas | Rosemary, cranberries | Red, green, silver |
| Summer party | Mint, cucumber, lemon | Green, yellow, clear |
| Birthday | Fruit skewers, sugar rim | Colorful, cheerful |
For gin garnishes, Mediterranean herbs like thyme, rosemary, and basil offer a refined addition that also works strongly visually.
How do you set up a festive sparkling bar?
A sparkling bar or drinks station is more than a table with bottles. It's a visual centerpiece that invites guests to serve themselves and sets the mood of the party. Decoration plays a big role in atmosphere, and a well-arranged bar makes that immediately visible.
-
Centralize the drinks. Place bottles, pitchers, and dispensers in the center of the table so guests can reach them from all sides. This prevents congestion and allows for self-service.
-
Use different heights. Place bottles on a wooden shelf, crate, or stand to create depth. Low glasses in front, tall bottles in back. This gives the bar a professional look without extra cost.
-
Work with chilled bins. A sparkling bar works best with chilled bins filled with ice for bottles and cans. This keeps drinks cold without needing a refrigerator and also looks decorative.
-
Plan continuous refills. Place reserve bottles and extra ice directly behind the bar, not in the kitchen. This way, you refill without leaving the guests, and the bar always stays stocked.
-
Limit the color palette. A limited color palette and a clear layout encourage self-service and prevent visual chaos. Choose two or three colors that match the theme and stick to them for napkins, cups, decorations, and flowers.
Pro-tip: Make small label cards for each drink with its name and whether it's alcoholic or non-alcoholic. This saves you dozens of questions during the party and makes the bar more accessible to all guests.
What mistakes should you avoid when decorating drinks?
Even experienced party hosts make mistakes when decorating drinks. Most problems can be prevented with prior knowledge.
Common mistakes with decals:
- Placing the decal in water too soon while the ink is still wet, causing colors to bleed
- Not applying a base coat, leading to silvering under the decal
- Pressing too hard when smoothing, causing tears
- Not lightly moistening the glass, causing the decal to stick immediately and be unmovable
Mistakes with frozen garnishes:
- Freezing for too short a time: timing is crucial, and too short a freezing period leads to unstable garnishes that melt immediately in the glass
- Placing the garnish too deep in the water, making the element invisible in the ice cube
- Starting to freeze on the morning of the party instead of the evening before
Mistakes with presentation and color:
- Combining too many different garnishes, making the drink look cluttered
- Choosing colors that clash with the theme or with each other
- Pouring glasses too full, leaving no room for garnish
“The most beautiful drink decorations are not the most elaborate. One strong garnish per glass, consistently applied, makes more of an impression than five different elements mixed together.”
Pro-tip: Always make a test glass the day before the party. This way, you can check if the colors are correct, the garnish is placed properly, and the decal adheres. A test glass takes five minutes and saves you stress on the day itself.
Key insights
Effective beverage decoration requires preparation, the right sequence, and conscious choices in materials and color.
| Point | Details |
|---|---|
| Start with materials | Ensure you have decal paper, varnish, ice molds, and garnishing tips before starting. |
| Follow the correct sequence for decals | Base coat, soaking, positioning, smoothing, and drying: do not skip any step. |
| Plan frozen garnishes in advance | Freeze cranberries or herbs for at least 6 hours before the party for stable results. |
| Limit your color palette | Two to three colors per bar or drink provide calm and a professional appearance. |
| Always test beforehand | A test glass or trial placement the day before the party prevents errors on the day itself. |
My honest take on beverage decoration at events
After years of organizing parties and setting up drinks stations, my most important lesson is this: less is almost always more. The first time I set up a sparkling bar, I used seven different garnishes, four colors of napkins, and three types of glasses. It looked busy, not festive. The second time, I opted for rosemary in ice cubes, one color, and two glass types. Everyone asked how I made it look so neat.
Decals are the technique I recommend most to beginners, but only if you take drying time seriously. I've too often seen people skip the 24 hours and then be disappointed by bleeding colors. Patience here is not a virtue; it's a requirement. Also, read the cocktail etiquette tips if you want to host a stylish event. The presentation of drinks is just as important as the taste.
What I've also learned: tailor your decoration to your guests, not your own taste. A children's party calls for colorful fruit skewers and cheerful sugar rims. A business dinner calls for subtle edible flowers and clear ice. The technique is the same, the choices are different. That distinction makes the difference between a pretty table and a table that truly fits the moment.
— Ruud
Ready-made mocktails and accessories from Cocktailsbynina
Do you want impressive beverage decorations without spending hours in the kitchen? Cocktailsbynina offers an extensive collection of ready-made mocktails that you can serve directly and decorate using the techniques from this article. Add a rosemary ice cube, a fruit skewer, or a sugar rim, and in minutes you'll have a festive drink that looks bar-quality.
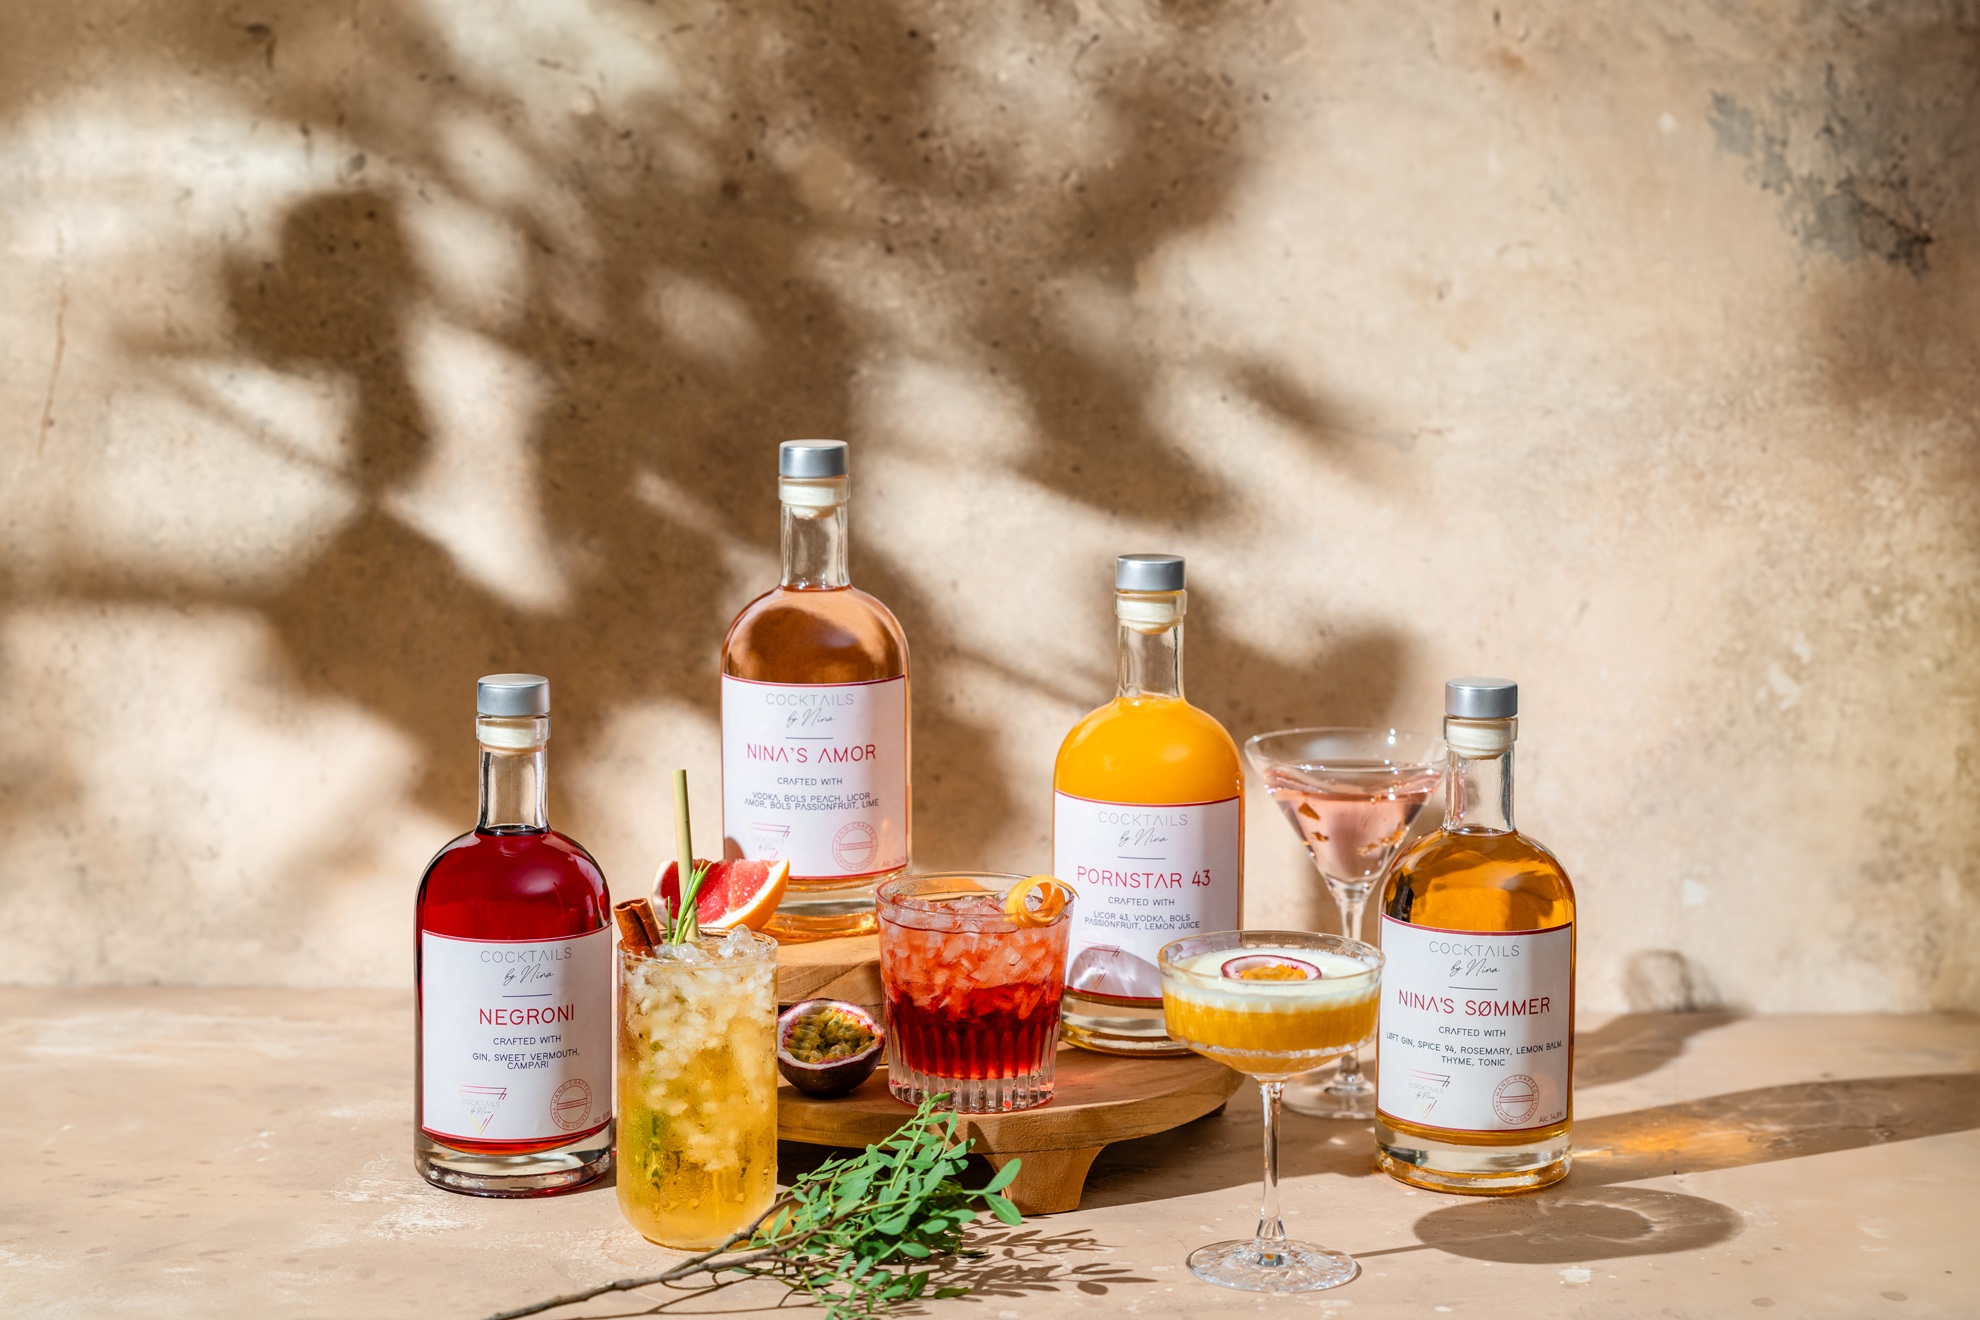
In addition to mocktails, Cocktailsbynina also offers accessories, glassware, and decorative materials for a complete drink experience. Whether you are organizing a birthday, wedding, or corporate event: the non-alcoholic cocktails are the perfect base for any step-by-step decoration you want to apply. Order easily online and receive everything at your home.
FAQ
How long should a decal dry before use on glass?
A decal must dry for at least 24 hours at room temperature after printing. Shorter drying time leads to bleeding colors as soon as the decal comes into contact with water.
How far in advance should you prepare frozen garnishes?
Start at least 6 hours before the party, preferably the evening before. Freezing for too short a time leads to unstable garnishes that melt immediately in the glass.
What is silvering in decals and how do you prevent it?
Silvering is a silvery haze under a decal, caused by air trapped between the decal and the glass. You can prevent it by applying a thin base coat of varnish to the glass before placing the decal.
How many garnishes should you use per drink?
One strong garnish per glass works better than multiple combined elements. Mocktails built in four steps with one finishing element look more professional than overcrowded glasses.
How do you prevent chaos at a drink station during a party?
Use a limited color palette and a clear layout with chilled bins and varying heights. Label cards next to each drink reduce questions and allow for self-service for all guests.